There’s something almost magical about watching those pink crystals catch the light in your kitchen. I remember the first time I held a handful of Himalayan pink salt—it looked like tiny rose quartz gems, and I honestly couldn’t believe something so beautiful was meant for cooking. Fast forward twenty years, and I’ve turned that fascination into a pink salt recipe that my family requests constantly for holiday gifts. Friends ask for jars. My daughter’s teacher specifically mentioned it at parent-teacher conferences. Not going to lie, that felt pretty good.
The thing is, making your own flavored pink salt at home isn’t some fancy chef technique. It’s actually ridiculously simple. Five steps. That’s it. And once you nail this, you’ll never go back to those overpriced gourmet salt blends at the specialty store. Trust me on this one.
Himalayan pink salt has absolutely exploded in popularity over the past decade, and for good reason. Beyond its stunning appearance, it carries trace minerals that regular table salt lacks. But here’s what really gets me excited: when you infuse it with your own combination of herbs, citrus, and spices, you create something completely unique. Something that tastes like your kitchen.
Today I’m walking you through my tried-and-true method—the exact same process I’ve refined over countless batches. Whether you’re a total beginner or someone who’s been cooking for decades like me, this homemade pink salt recipe step by step will become one of your go-to projects.
What is a Pink Salt Recipe and Why You’ll Love It
Before we get our hands dirty, let’s talk about what we’re actually making here. Because understanding the “why” makes the “how” so much easier.
Understanding Pink Salt and Its Origins
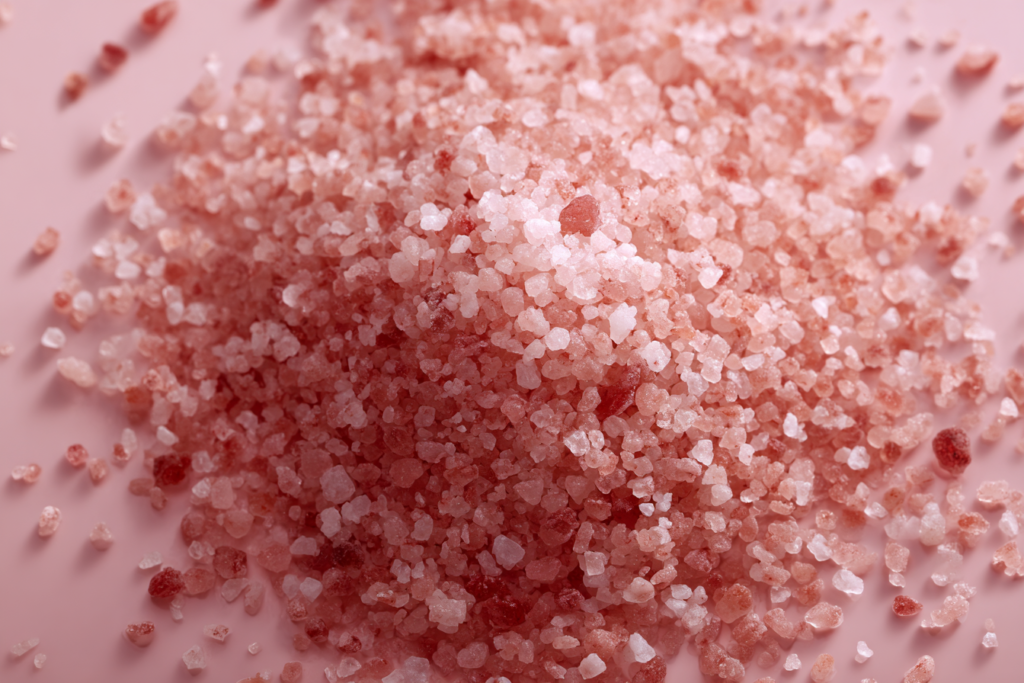
Himalayan pink salt comes from ancient sea salt deposits in the Punjab region of Pakistan, near the Himalayas. We’re talking 250 million years old. That blows my mind every time I think about it. The pink color? That comes from iron oxide and other trace minerals trapped in the crystals—stuff like potassium, magnesium, and calcium.
Now, I should be honest with you. The mineral content is pretty small. We’re not talking major health benefits from the minerals alone. But what pink salt doesn’t have is the anti-caking agents and heavy processing that table salt goes through. It tastes cleaner to me. Brighter, somehow.
According to Healthline’s research on Himalayan salt, while the health claims are sometimes overstated, the minimal processing does mean fewer additives in your food. That matters to me when I’m cooking for my family.
The texture is different too. Coarse pink salt has this satisfying crunch that regular salt just can’t match. It’s why finishing salts have become such a thing in restaurants.
Benefits of Making Your Own Homemade Pink Salt Recipe
Here’s where things get interesting from a practical standpoint.
Those little jars of herb-infused salt at fancy kitchen stores? They run anywhere from $8 to $15 for maybe four ounces. I can make a pound of custom blended pink salt for roughly the same price. The math isn’t even close.
But cost savings aren’t even my favorite part. It’s the customization. Want a salt that’s heavy on the rosemary because that’s what your roasted potatoes crave? Done. Obsessed with lemon like my youngest is? Make it extra citrusy. You’re in complete control.
And let me tell you about gifts. Last Christmas, I made eight different flavored salts, packaged them in little mason jars with handwritten labels, and gave them to neighbors. Three of them actually teared up. Something about homemade gifts hits different, you know? If you’re looking for more homemade gift ideas from the kitchen, flavored salts should be at the top of your list.
The freshness factor matters too. Store-bought blends sit on shelves for who knows how long. When you make it yourself, you know exactly when those herbs were added.
What This Step by Step Guide Will Teach You
I’ve designed this guide for absolute beginners. If you can measure ingredients and stir, you can do this. Seriously.
The whole process takes about 20 minutes of active work. If you’re using fresh citrus zest, add another hour or so for drying time (mostly hands-off). That’s it.
By the end, you’ll understand not just how to follow this specific recipe, but the principles behind flavored salts in general. That means you can experiment endlessly once you’ve got the basics down.
Ingredients for Pink Salt Recipe with Helpful Notes
Let’s talk about what you’ll need. I’m giving you my base recipe plus variations, because I know everyone’s taste is different.
Essential Ingredients for Your Homemade Pink Salt Recipe
For the base recipe, you’ll need:
- 1 cup Himalayan pink salt — I prefer coarse grind, but fine works too
- 2 tablespoons dried herbs — rosemary and thyme are my favorites
- 1 tablespoon citrus zest — lemon is classic, but orange is incredible with rosemary
- 1 teaspoon garlic powder — optional but recommended
For variations, consider adding:
- Dried edible flowers (lavender is gorgeous)
- Red chili flakes for heat
- Dried onion powder
- Cracked black pepper
- Dried oregano for an Italian blend
The beauty of this recipe is flexibility. My husband prefers his with extra garlic and black pepper. My sister makes hers with lavender and lemon for fish dishes. There’s no wrong answer here.
Ingredient Quality Tips for Best Results Pink Salt Recipe
Okay, here’s the thing—quality matters more than you might think.
For the pink salt itself, look for salt that’s actually pink throughout, not white salt with pink coloring. Real Himalayan salt should have subtle color variations, from pale pink to deeper rose tones. If it looks too uniform, that’s a red flag.
I get mine from a local spice shop, but plenty of reputable online sources exist. Serious Eats has an excellent guide to different salts if you want to geek out on the details.
For dried herbs, organic is worth it when you can swing it. The flavor is noticeably stronger. Check the color too—dried herbs should still look vibrant, not brown and sad. If your rosemary looks gray, it’s too old.
When zesting citrus, organic matters here too since you’re using the peel. Give non-organic fruit a good scrub if that’s what you’ve got. No judgment—we work with what we have.
Equipment and Tools Needed
Nothing fancy required:
- Medium mixing bowl — glass or ceramic works best
- Measuring cups and spoons
- Mortar and pestle OR food processor — depending on desired texture
- Baking sheet — if using fresh citrus zest
- Parchment paper
- Airtight containers or jars — for storage
- Microplane or fine grater — for citrus zest
If you don’t have a mortar and pestle, a zip-lock bag and rolling pin work in a pinch. I’ve done it plenty of times when my good mortar was in the dishwasher.
How to Make Pink Salt Recipe Step by Step
Alright, let’s get into it. This is where the magic happens.
Step 1 – Prepare and Measure Your Ingredients
First things first: get everything measured and ready before you start. Mise en place, as the fancy folks say. It really does make the whole process smoother.
Measure out your cup of pink salt and pour it into your mixing bowl. If you’re using coarse salt but want a finer finished product, now’s the time to pulse it a few times in the food processor. Don’t go overboard—you still want some texture.
For the herbs, measure your 2 tablespoons. If they’re large pieces (like whole rosemary leaves), crumble them between your fingers first. You want smaller bits that’ll distribute evenly through the salt.
If you’re using fresh citrus zest, zest your lemon (or orange, or lime) over a small bowl. You’ll need about 1 tablespoon, which is roughly one medium lemon. Use a microplane for the finest zest—it incorporates better than larger pieces. Just watch your knuckles. I’ve learned that lesson more than once.
Set up your workspace with a clear surface, your containers ready nearby, and a baking sheet lined with parchment if you’re using fresh zest.
Step 2 – Combine Pink Salt with Chosen Flavors
Here’s where it starts smelling incredible.
Add your dried herbs to the salt in the mixing bowl. Use your hands to toss everything together. Honestly, your hands work better than a spoon here—you can feel when things are evenly distributed.
If you’re adding garlic powder, sprinkle it over the mixture and toss again. Same with any other dry additions like chili flakes or black pepper.
The ratio I’ve found works best is roughly 1 cup salt to 2-3 tablespoons of total add-ins. Go heavier and you risk the salt clumping or the flavors becoming overpowering. Go lighter and it’s… well, just salt with flecks in it.
For citrus zest, sprinkle it over the salt mixture and immediately start working it in with your fingers. The oils in the zest want to clump—your job is to break up those clumps and coat the salt crystals evenly. Keep rubbing and mixing for a solid two minutes. Your kitchen will smell amazing.
This is also a perfect base for other recipes. If you love seasoning blends, check out my herb seasoning blends for beginners for more ideas.
Step 3 – Blend to Your Desired Texture
This step is optional but gives you control over the final product.
For a coarse finishing salt (my personal favorite for steaks and roasted vegetables), skip the blending entirely. Just make sure everything is well combined by hand.
For a medium texture that works well as an all-purpose seasoning, transfer the mixture to a mortar and pestle. Gently grind in circular motions for about 30 seconds. You’re not trying to pulverize it—just break down the larger herb pieces and help the flavors meld.
For a fine texture (great for baking or when you want salt that dissolves quickly), use a food processor. Pulse in 3-second bursts, checking after each pulse. Stop when you reach your desired consistency. Over-processing turns everything to powder, and you lose that beautiful crystalline quality.
I usually make batches of both coarse and fine from the same base recipe. Different textures for different purposes.
Step 4 – Dry the Mixture if Using Fresh Ingredients
If you used fresh citrus zest (and I really hope you did—it’s so much better than dried), you need to dry your salt before storing. Skip this step if everything you used was already dried.
Spread your salt mixture in a thin, even layer on the parchment-lined baking sheet. Really spread it out—clumps won’t dry properly in the middle.
You’ve got two options:
Oven method (faster): Set your oven to its lowest setting, ideally around 170-200°F. Place the baking sheet inside and leave the door cracked slightly. Let it dry for 1-2 hours, stirring every 30 minutes. The salt is ready when the zest feels completely dry and the mixture moves freely without sticking.
Air-dry method (gentler): Leave the baking sheet out on your counter, uncovered, for 24-48 hours. Stir occasionally. This preserves more of the volatile oils in the citrus but requires patience.
I usually go with the oven method because I’m impatient. But when I’m making gifts and want the most vibrant lemon flavor, I air-dry. The difference is noticeable.
You’ll know it’s properly dried when the salt doesn’t clump when you squeeze a handful. If it sticks together, keep drying.
Step 5 – Store Your Homemade Pink Salt Recipe Properly
Almost there! But don’t rush this part—proper storage makes the difference between salt that lasts a year and salt that goes stale in a month.
Let your dried salt cool completely to room temperature. This takes about 30 minutes after oven drying. Storing warm salt creates condensation in the jar, which leads to clumping and potential mold with the herbs. Not good.
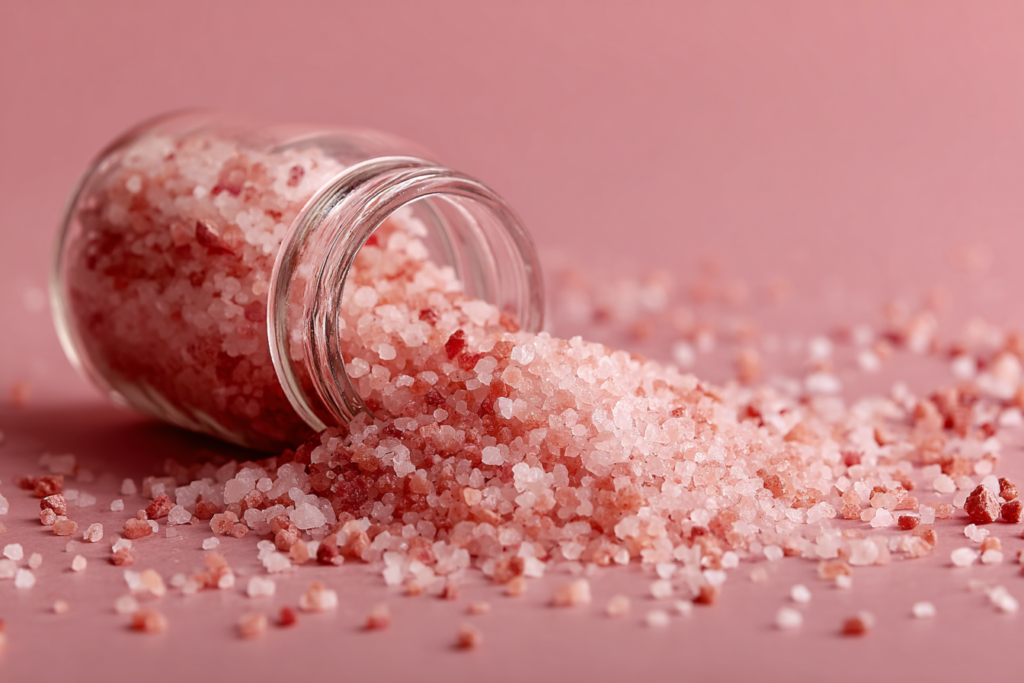
Transfer to airtight containers. I love small mason jars because they’re pretty enough for gift-giving, but any airtight container works. Glass is better than plastic since it won’t absorb odors over time.
Label everything. Write the flavor profile, the date you made it, and any notes about usage. I’ve learned this the hard way—three months from now, you won’t remember which pink salt has chili flakes and which one is lemon-rosemary.
Store in a cool, dark place. Your pantry is perfect. Avoid storing near the stove where heat and humidity fluctuate.
Properly stored, your homemade pink salt will stay fresh for 6-12 months. The flavor does gradually diminish over time, so I try to use each batch within 6 months and just make more as needed.
Tips for the Perfect Pink Salt Recipe Every Time
After making probably hundreds of batches over the years, I’ve collected some wisdom I wish someone had told me early on.
Achieving the Ideal Flavor Balance Step by Step
The biggest mistake beginners make is going too heavy on the add-ins. Start conservative. You can always make your next batch stronger.
My tried-and-true ratio is 1 cup salt to 2 tablespoons total herbs/spices, plus 1 tablespoon citrus zest if using. This creates a noticeably flavored salt that enhances food without overwhelming it.
Taste as you go. Seriously. Sprinkle a tiny bit on your palm and lick it like you’re testing tequila. Does the herb flavor come through? Is the citrus present but not aggressive? Adjust before you commit to drying.
Different herbs have different potency
Print
Pink Salt Recipe in 5 Simple Steps You Will Never Forget
- Total Time: 40
- Yield: 2 cups 1x
- Diet: Vegan
Description
A homemade flavored Himalayan pink salt blend infused with herbs, citrus, and spices. This beautiful artisan salt makes a perfect gift and elevates any dish with its stunning rose-colored crystals and unique flavor profile.
Ingredients
- 2 cups Himalayan pink salt (coarse or fine grain)
- 2 tablespoons dried rosemary, finely chopped
- 1 tablespoon dried thyme
- 1 tablespoon dried lemon zest
- 1 teaspoon garlic powder
- 1 teaspoon black pepper, freshly ground
- 1/2 teaspoon dried oregano
Instructions
- Measure out 2 cups of Himalayan pink salt into a large mixing bowl.
- Add all dried herbs, lemon zest, garlic powder, and black pepper to the salt.
- Mix thoroughly with a wooden spoon or your hands until all ingredients are evenly distributed throughout the salt.
- Spread the mixture on a baking sheet and bake at 200°F (93°C) for 30 minutes to remove any moisture and help the flavors meld.
- Allow to cool completely, then transfer to airtight glass jars for storage.
Notes
- Use coarse salt for finishing dishes and fine salt for cooking and baking.
- Store in airtight containers away from moisture for up to 6 months.
- Customize with your favorite dried herbs like lavender, sage, or chili flakes.
- Makes beautiful gifts when packaged in small glass jars with ribbon.
- Let the salt cool completely before jarring to prevent condensation.
- Prep Time: 10
- Cook Time: 30
- Category: Condiment
- Method: Baking
- Cuisine: American
Nutrition
- Serving Size: 1/4 teaspoon
- Calories: 0
- Sugar: 0g
- Sodium: 480mg
- Fat: 0g
- Saturated Fat: 0g
- Unsaturated Fat: 0g
- Trans Fat: 0g
- Carbohydrates: 0g
- Fiber: 0g
- Protein: 0g
- Cholesterol: 0mg
Keywords: pink salt recipe, homemade pink salt recipe step by step, flavored salt, Himalayan salt blend, herb salt, seasoned salt, DIY gourmet salt, infused salt recipe