My Grandfather’s Secret to Perfect Pickled Peaches
My grandfather, a dedicated orchardist, always had a jar of pickled peaches on hand. His secret? A touch of cardamom and letting them sit for at least two weeks. He claimed it mellowed the spice and intensified the fruit’s natural sweetness.
It’s a small thing, but the difference it made was incredible. The warmth of the cardamom balanced the tartness of the vinegar and brought out the peaches’ natural flavors. Plus, the long rest allowed the fruit to fully absorb the brine, resulting in a pickle that was sweet, tangy, and subtly spiced all at once.
His tip lives on with this recipe, and I think you’ll find that letting the flavors mellow truly makes all the difference in getting a perfectly balanced result.
Why You’ll Love These Pickled Fruit Recipes
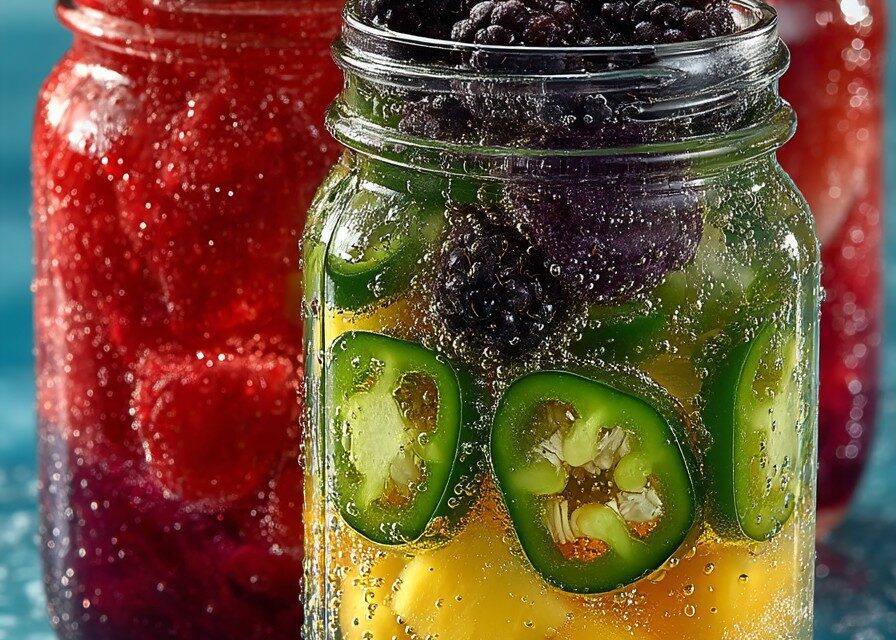
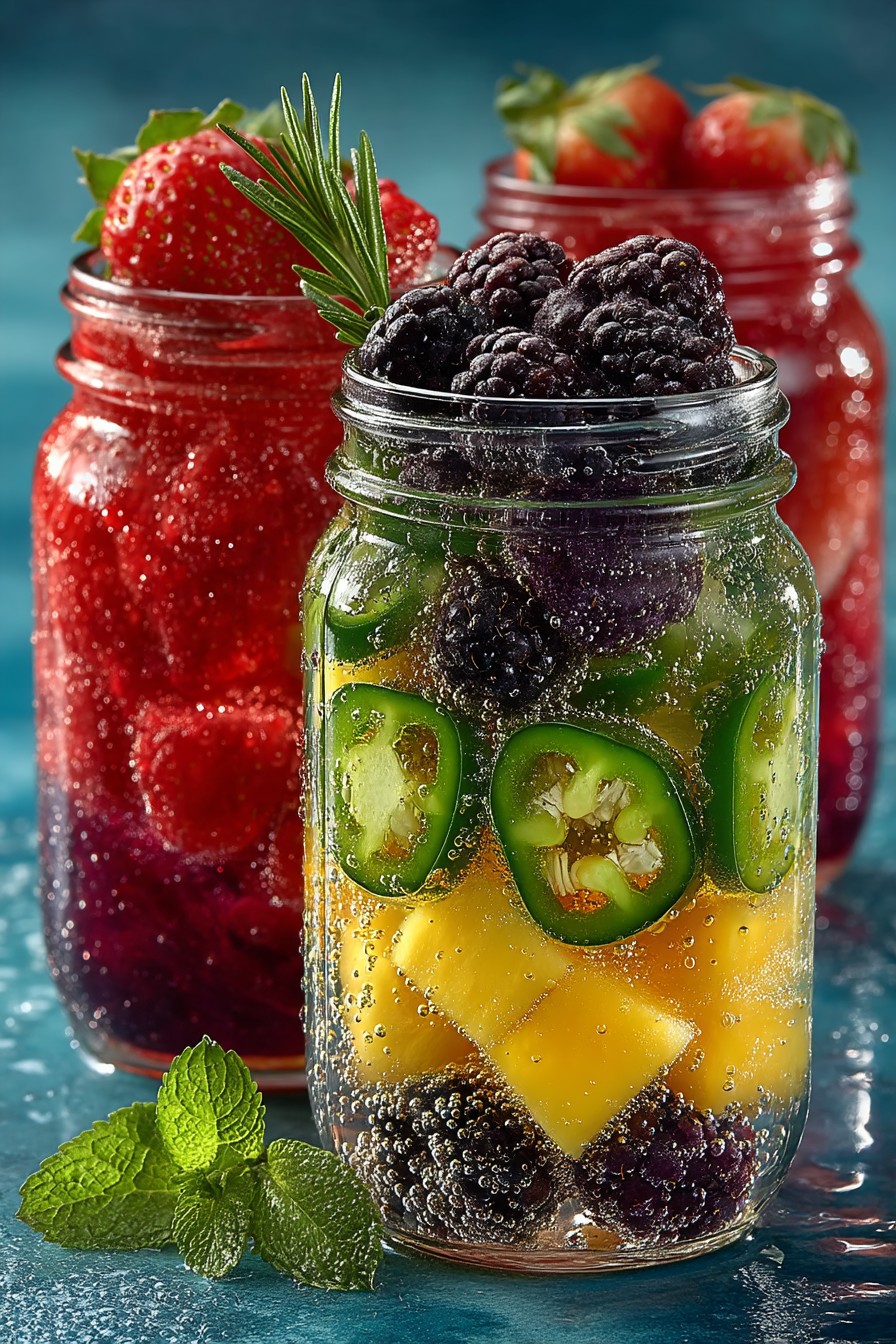
- The bright colors of the fruit combined with warming spices create a stunning visual and flavor contrast on any plate.
- It adds a surprisingly wonderful twist to grilled meats or fish—the sweetness cuts through the richness beautifully.
- You can easily customize the spices to suit your taste or complement the fruit you’re using.
- It’s a fantastic way to extend the life of summer fruits well into the cooler months.
- These easy pickled fruit recipes make a unique and thoughtful homemade gift.
What You’ll Need
Fruit
Use firm, ripe fruit. Soft or overripe fruit will become mushy during the pickling process. I often choose peaches, plums, or cherries, but blueberries, apples, or even pears can be tasty. Consider the texture of the fruit as well. Fruits with a naturally crisp texture, like apples and pears, tend to hold up better during pickling than softer fruits like berries. If using berries, handle them gently to avoid bruising.
For the best results, select fruits that are in season and at their peak ripeness. This will ensure that they have the most flavor and will hold their shape well during pickling. Locally sourced fruit is always a great option, as it tends to be fresher and more flavorful than fruit that has been shipped from afar.
Don’t be afraid to experiment with different types of fruit to create unique and exciting flavor combinations. Just be sure to choose fruits that complement each other in terms of taste and texture.
Vinegar
White vinegar, apple cider vinegar, or rice vinegar all work well—each creates a distinct outcome. White vinegar will yield the most neutral flavor, while apple cider vinegar adds a hint of sweetness. I prefer apple cider vinegar for its depth, but it’s all up to your preference.
The type of vinegar you choose will significantly impact the overall flavor of your pickled fruit. White vinegar provides a clean, sharp tang, while apple cider vinegar offers a more complex and fruity flavor. Rice vinegar is milder and slightly sweet, making it a great choice for more delicate fruits.
Consider the acidity level of the vinegar as well. Vinegar typically has an acidity level of 5%, which is ideal for pickling. Using vinegar with a lower acidity level may not properly preserve the fruit and could lead to spoilage.
Sugar
Granulated sugar is the most common choice, providing a clean sweetness that balances the vinegar’s tang. You can also experiment with brown sugar or honey for a richer flavor, but start with granulated until you get to know your preference.
The amount of sugar you use will depend on the type of fruit you’re pickling and your personal preference. Some fruits, like peaches and plums, are naturally sweeter than others, so you may need to use less sugar. Taste the brine as you go and adjust the sweetness accordingly.
Brown sugar adds a molasses-like flavor that pairs well with warm spices like cinnamon and cloves. Honey provides a floral sweetness that complements fruits like apples and pears. Maple syrup adds a unique caramel-like flavor that can upgrade your pickled fruit recipes to a new level.
Consider using a combination of different sweeteners to achieve a more complex and nuanced flavor. For example, you could use a blend of granulated sugar and honey to add both sweetness and floral notes to your pickled fruit.
Spices
Cinnamon sticks, cloves, star anise, peppercorns, and mustard seeds add depth and complexity to the brine. Feel free to customize the spice blend to your liking—this is where you can have some real fun!
The spices you choose will greatly influence the overall flavor of your pickled fruit. Cinnamon, cloves, and star anise add warmth and spice, while peppercorns provide a subtle kick. Mustard seeds offer a slightly bitter and pungent flavor that complements a variety of fruits.
Experiment with different spice combinations to create unique and exciting flavor profiles. For example, you could try adding cardamom, ginger, or allspice to your brine for a more exotic twist.
Toast your spices lightly before adding them to the brine to enhance their flavor. Simply heat them in a dry skillet over medium heat for a few minutes, until they become fragrant. Be careful not to burn them, as this will make them taste bitter.
Aromatics
Onions, ginger, garlic, or chili peppers can be added whole or sliced. I would suggest using fresh, since it offers the zesty edge that can be missed if you use them dried.
Aromatics like onions, ginger, and garlic add depth and complexity to the brine. Chili peppers provide a spicy kick that balances the sweetness of the fruit and sugar. These also make it easy to customize your pickled fruit recipes.
Use fresh aromatics whenever possible, as they have a brighter and more intense flavor than dried ones. Slice the aromatics thinly to allow their flavors to infuse into the brine more easily. If you don’t have any fresh, dried will work. Be sure to use about half as much.
Ginger adds a warm and spicy flavor that pairs well with fruits like peaches, plums, and pears. Garlic provides a savory and pungent flavor that complements bolder fruits like cherries and grapes. Chili peppers add a fiery kick that can be adjusted to your personal preference.
Add the aromatics to the brine along with the spices, allowing them to simmer together for a few minutes to release their flavors.

How to Make Quick Pickled Fruit
Preparing the Fruit
Step 1: Wash and Prep: Thoroughly wash your chosen fruit. Depending on the fruit, you may need to peel, pit, core, or slice it into bite-sized pieces. I like to leave the skin on peaches and plums for a bit of color and texture.
Step 2: Pack Jars: Pack the prepared fruit tightly into sterilized glass jars, leaving about 1/2 inch of headspace at the top. Packing tightly will help prevent the fruit from floating above the brine later.
Step 3: Get Spiced: Add your desired spices to each jar, distributing them evenly among the fruit. I usually go for a cinnamon stick, a few cloves, and a star anise per pint jar.
Making the Brine
Step 4: Combine Ingredients: In a saucepan, combine the vinegar, sugar, and any additional spices for the brine, such as peppercorns or bay leaves. I like to use a ratio of 1 part vinegar to 1/2 part sugar, but you can adjust it to your taste.
Step 5: Boil and Stir: Bring the mixture to a boil over medium heat, stirring until the sugar is completely dissolved. The boiling helps the spices release their flavors and creates a clear, syrupy brine.
Step 6: Cool Slightly: Remove the brine from the heat and let it cool slightly for a few minutes. Don’t skip this, so the herbs have a chance to infuse the liquid.
Pickling the Fruit
Step 7: Pour Over Fruit: Carefully pour the hot brine over the fruit in the jars, ensuring the liquid covers the fruit completely. Tap the jars gently to release any trapped air bubbles.
Step 8: Seal and Process: Wipe the rims of the jars clean, then seal them with lids and rings. At this point, you can process them in a hot canning bath or simply move them to the fridge once cool. Don’t forget to use new lids, as reusing them can result in poor sealing.
Step 9: Cool and Refrigerate: Let the jars cool completely at room temperature before storing them in the refrigerator. Remember, the flavor will improve as the fruit marinates in the brine, so try to wait at least a few days before digging in.
Before you start pickling, make sure you have all of your ingredients and equipment ready. This will help streamline the process and prevent any unnecessary delays. Measure out your spices and aromatics in advance so you can easily add them to the brine when needed.
When pouring the hot brine over the fruit, be careful not to splash it on your skin. The brine can be very hot and can cause burns. Use a ladle or a measuring cup with a spout to pour the brine carefully into the jars.
After sealing the jars, let them cool completely at room temperature before transferring them to the refrigerator. This will allow the fruit to absorb the brine and develop its flavor. The flavor will continue to develop over time, so try to wait at least a few days before eating the pickled fruit.

Tips for Perfect Pickled Fruit
- Use a sterilized jar to prevent spoilage. Sterilizing your jars is simple—just boil them in water for 10 minutes.
- Don’t overcook the fruit, or it will become mushy. The goal is to keep a bit of firmness, so don’t simmer the fruit in the brine.
- Adjust the amount of sugar and spices to your liking. If you prefer a sweeter pickle, add a bit more sugar.
- For a spicier pickle, just add a pinch of red pepper flakes or a small chili pepper to the brine.
When sterilizing your jars, make sure to sterilize the lids and rings as well. This will help prevent any bacteria from contaminating the pickled fruit. You can sterilize the lids and rings by boiling them in water for 10 minutes along with the jars. Alternatively, you can run them through the dishwasher on the sanitize cycle.
When adjusting the amount of sugar and spices, start with small amounts and taste the brine as you go. It’s always easier to add more sugar or spices than it is to take them away. Keep in mind that the flavor of the pickled fruit will intensify over time, so it’s best to err on the side of caution.
To prevent the fruit from floating above the brine, you can weigh it down with a sterilized glass weight or a small plate. This will help ensure that the fruit is fully submerged in the brine and will pickle evenly.
If you’re using a canning kit, be sure to use the jar lifter to safely remove the hot jars from the water bath. The jars will be very hot and can be easily dropped if you’re not careful.
Variations and Substitutions
- For a Sweet Pickled Fruit: Sweeten your favorite pickled fruit recipes with honey or light agave. You can even try maple syrup for a nice depth.
- Add different fruits: Try using a combination of different fruits for a more complex flavor. Peaches and plums pair particularly well together.
- Experiment with herbs: You really can’t go wrong with fresh herbs like rosemary, thyme, or mint in the brine. They add a layer of freshness and complexity.
- Spice it up: Incorporate a habanero pepper for a kick. Be careful, though—a little goes a long way!
- Try different vinegars: Swap white or apple cider vinegar for rice vinegar or red wine vinegar for different flavor nuances. I find rice wine vinegar gets underused and should be more popular.
For a unique twist
try adding a splash of your favorite liquor to the brine. Bourbon, rum, or brandy can add a complex and warming flavor that complements a variety of fruits and spices. Use a high-quality liquor for the best results and add it to the brine after it has cooled slightly.
If you’re looking for a vegan alternative to honey, try using agave nectar or maple syrup. Agave nectar has a mild and neutral flavor that won’t overpower the other ingredients, while maple syrup adds a rich and smoky flavor that pairs well with warm spices.
Consider adding dried fruit, such as raisins, cranberries, or apricots, to your pickled fruit for added sweetness and texture. The dried fruit will absorb the brine and become plump and juicy, adding a wonderful surprise to your pickled fruit recipes.
For a savory twist, try adding a pinch of salt to the brine. Salt helps to balance the sweetness of the fruit and sugar and enhances the other flavors in the brine. Use a high-quality sea salt or kosher salt for the best results.
If you’re using a pressure canner to process your pickled fruit, follow the manufacturer’s instructions carefully. Pressure canning is a more advanced method of preserving food that requires specific equipment and techniques. It’s important to follow the instructions carefully to ensure that the fruit is properly preserved and safe to eat.
Storage and Reheating
- Fridge: Store pickled fruit in the refrigerator in an airtight container for up to 2 weeks. The fruit will continue to absorb the brine and become even more flavorful over time.
- Freezer: Freezing is not recommended, as it can alter the texture of the fruit, making it mushier when thawed.
- Reheating: Not applicable, as pickled fruit is typically served cold or at room temperature. That said, some people will grill it briefly or add it to a pan sauce for a little extra sweetness and tang.
To ensure that your pickled fruit stays fresh for as long as possible, store it in a cool, dark place. Exposure to light and heat can cause the fruit to spoil more quickly. A pantry or a cool basement is an ideal place to store your pickled fruit.
When storing pickled fruit in the refrigerator, make sure to use an airtight container. This will help prevent the fruit from drying out and absorbing odors from other foods in the refrigerator. Glass jars with tight-fitting lids are a great option for storing pickled fruit.
If you’re planning on storing your pickled fruit for an extended period of time, consider using a vacuum sealer to remove the air from the container. This will help prevent oxidation and keep the fruit fresh for longer. Vacuum sealing is a great option for preserving the flavor and texture of your pickled fruit.
Before serving pickled fruit
give it a taste and adjust the seasoning as needed. You may need to add a pinch of salt, sugar, or vinegar to balance the flavors. Taste and adjust is the best way to arrive at truly inspired pickled fruit recipes.
Pickled fruit can be used in a variety of creative ways. Add it to cheese boards, salads, sandwiches, or even cocktails for a burst of flavor and texture. The possibilities are endless! Try using pickled grapes in a chicken salad for a unique lunch.
You can also get creative in the kitchen with your leftover brine. Many people use a fruit-infused brine as a glaze for vegetables. Pickled grapes pair especially well with roasted broccoli. You can also use a peach fruit brine as a glaze over pork chops.
Another great way to use leftover brine is in salad dressings. Combine the brine with olive oil and spices for a sweet and tangy vinaigrette.
If you aren’t ready to throw your leftover spices away, you can add them to a simmering pot of rice. The rice will absorb the flavors, leaving you with a delicious and subtle complement to your meal.
Don’t overlook these additional recipe-specific content options. They can upgrade your dish considerably.
FAQ
Q: How long does pickled fruit last?
A: Pickled fruit will last for up to 2 weeks in the refrigerator when stored properly.
Q: Can I use frozen fruit for pickling?
A: Fresh fruit is recommended for the best texture and flavor.
Q: Do I need to sterilize my jars before pickling?
A: Yes, sterilizing your jars is crucial to prevent spoilage. This is particularly important if you plan on storing it in the pantry. You can sterilize them by boiling them in water for 10 minutes.
Q: How can I use pickled fruit?
A: Pickled fruit is incredibly versatile. Serve it on a cheese board alongside crackers and nuts, add it to salads for a sweet and tangy contrast, or use it as a topping for grilled meats or fish.
Q: What if my pickled fruit is too sour?
A: If your pickled fruit is too sour, you can add a little more sugar to the brine.
Q: What if my pickled fruit is too sweet?
A: If your pickled fruit is too sweet, you can add a little more vinegar to the brine. Reduce or eliminate sugar in your next pickled fruit recipes.
Helpful References:
Pickled Fruit Recipes
- Prep Time: 10
- Cook Time: 30
- Total Time: 40
- Yield: 6 servings 1x
- Category: Side Dish
- Method: Boiling, Mixing
- Diet: Gluten Free, Vegan, Vegetarian
Description
Pickled fruit is a delightful and unexpected condiment that can transform your everyday dishes. This recipe offers a sweet, tangy, and surprisingly versatile way to preserve seasonal fruits, adding a burst of brightness and complexity to everything from cheese boards to salads. Let these flavors mellow to make the most of a balanced result. For a different and delicious dessert, check out this Strawberry Crunch Poke Cake Recipe.
Ingredients
- 2 pounds firm, ripe fruit (peaches, plums, cherries, apples, or pears)
- 2 cups white vinegar (or apple cider vinegar, or rice vinegar)
- 1 cup granulated sugar
- 1 cup water
- 2 tablespoons pickling spice
- 1 teaspoon salt
- Optional: 1 cinnamon stick
- Optional: 1/2 teaspoon cardamom pods
Instructions
- Prepare the Fruit: Wash and pit or core the fruit, then cut it into uniform pieces.
- Combine Brine Ingredients: In a large saucepan, combine the vinegar, sugar, water, pickling spice, and salt. Add cinnamon stick and cardamom pods if using.
- Bring to a Boil: Bring the brine mixture to a boil over medium-high heat, stirring until the sugar and salt are dissolved.
- Add Fruit to the Brine: Gently add the prepared fruit to the boiling brine.
- Simmer the Fruit: Reduce heat to low and simmer for about 5-10 minutes, or until the fruit is slightly softened but still holds its shape. Do not overcook.
- Transfer to Jars: Using a slotted spoon, carefully transfer the hot fruit to sterilized jars, leaving about 1/2 inch headspace.
- Pour Brine Over Fruit: Pour the hot brine over the fruit in the jars, ensuring the fruit is completely submerged. Leave about 1/2 inch headspace.
- Remove Air Bubbles: Gently tap the jars on the counter to release any trapped air bubbles.
- Seal the Jars: Wipe the rims of the jars with a clean, damp cloth, then place the lids on top and screw on the bands until fingertip tight.
- Process in Water Bath: Process the jars in a boiling water bath for 10 minutes to ensure proper preservation.
- Cool and Store: Remove the jars from the water bath and let them cool completely on a towel-lined surface. As they cool, you should hear a popping sound indicating that the jars are sealed.
- Check Seals and Store: Check the seals by pressing down on the center of each lid. If the lid doesn’t flex, the jar is properly sealed. Store in a cool, dark place for at least 2 weeks before enjoying.
Notes
- Fruit Substitutions: Use other firm fruits such as grapes, cranberries, or sliced citrus.
- Spice Variations: Add other spices like star anise, cloves, peppercorns, or a pinch of red pepper flakes for extra flavor.
- Make Ahead: Pickled fruit can be made up to a year in advance and stored in a cool, dark place.
- Storage: Properly sealed jars can be stored at room temperature for up to 1 year. Once opened, refrigerate and consume within 2 weeks.
- Serving Suggestions: Serve with cheese and crackers, as a topping for grilled meats or salads, or as a sweet-and-tangy addition to sandwiches or tacos.
- Reheating: Pickled fruit is best served chilled or at room temperature. Reheating is not recommended as it can make the fruit mushy.
- Vinegar Options: Experiment with different vinegars, such as balsamic or sherry vinegar, for a more complex flavor profile.
Nutrition
- Array