If you’ve struggled with soggy wings or uneven cooking, this method fixes that. It leans on airflow, surface dryness, and just enough fat to create that restaurant-style texture at home. Once you understand why each step works, you can repeat it confidently with any flavor you like.
This recipe is designed to be reliable whether you’re making a quick weeknight batch or cooking for a crowd. It scales easily, adapts to different sauces, and doesn’t rely on complicated prep. With just a few adjustments, you can dial in the exact level of crispness and seasoning you prefer.
The Crispy Wing Method I Keep Coming Back To
Great wings don’t happen by accident. The difference between pale, soft skin and that irresistible crackly bite comes down to three things: dry surface, light coating, and high heat.

Patting the wings completely dry isn’t optional. Any moisture turns to steam in the air fryer, and steam is the enemy of crispiness. A thin dusting of cornstarch fixes that. It absorbs leftover moisture and creates a delicate crust that cooks up light and crunchy, not heavy.
The butter might seem like a small detail, but it carries the seasoning and helps the skin brown evenly. You’ll notice it melts into the wings as they cook, leaving behind rich flavor without making them greasy. Once you dial this in, the method becomes second nature.
Another key detail is airflow. Air fryers work by circulating hot air rapidly, so spacing matters. Even a little overlap can trap steam and undo all your prep work. Think of it less like baking and more like roasting with strong convection.
Timing also plays a role. Wings benefit from a two-stage cook—first to render fat under the skin, then to crisp the exterior. That’s why flipping halfway through is important. It exposes all sides to heat and ensures even browning without dry spots.
Why You’ll Love This Air Fryer Chicken Wings Recipe
- Crispy skin without deep frying — no splatter, no lingering oil smell in your kitchen
- Juicy meat that stays tender thanks to the butter coating and high-heat cook
- Fast enough for a weeknight but reliable enough for a full tray during game night
- Seasoning is simple but balanced, and easy to tweak if you want more heat or sweetness
- Works with sauces or dry rubs, so you can change the flavor without changing the method
- Minimal cleanup compared to traditional frying or oven methods
Choosing the Best Wings
Not all wings cook the same, and a few small choices can improve your results right away.
- Fresh vs frozen: Fresh or fully thawed wings always crisp better. Frozen wings release excess water, which slows browning.
- Whole vs split: Split wings (drumettes and flats) cook more evenly and expose more surface area.
- Size matters: Medium wings tend to cook more consistently than very large ones, which can brown too quickly outside before fully rendering inside.
If your wings seem extra wet straight from the package, let them sit uncovered in the fridge for an hour. This air-dries the skin slightly and improves crisping even more.
You can also trim excess skin or loose fat if needed. While some fat helps flavor, too much can drip during cooking and reduce crispness. A quick inspection before seasoning keeps everything balanced.
What You’ll Need
Main Protein
- Chicken wings (2 lbs, thawed) – Split wings cook more evenly and give you more surface area for crisping. Thawed wings are key here; frozen ones release too much water at the start.
Liquid / Fat
- Salted butter (2 tablespoons, melted) – Adds richness and helps seasoning stick. This is the one I always reach for because it builds flavor quickly without extra steps.
Spices
- Kosher or sea salt (1 teaspoon) – Brings everything into focus and draws out moisture for better browning.
- Garlic powder (1 teaspoon) – Gives that savory backbone without burning like fresh garlic might at high heat.
- Onion powder (1 teaspoon) – Rounds out the flavor and adds subtle sweetness.
- Smoked paprika (1 teaspoon) – Adds color and a gentle smokiness that mimics grilled wings.
- Black pepper (½ teaspoon) – Light heat that builds in the background.
Coating
- Cornstarch (2 tablespoons) – The real secret. It creates a thin, crisp shell that feels almost shattery when you bite in.
If you want to experiment, you can swap part of the cornstarch with rice flour for an even lighter texture. Just keep the coating thin so it doesn’t turn cakey.
Optional Add-Ins for Extra Flavor
- Baking powder (½ teaspoon): Can be combined with cornstarch for extra blistered skin, but use sparingly to avoid aftertaste.
- Chili powder or cayenne: Adds direct heat without changing the texture.
- Brown sugar (1–2 teaspoons): Helps caramelization if you like a slightly sweet finish.
How to Make Air Fryer Chicken Wings

Prep & Season
- Step 1: Preheat the air fryer to 400°F for 5 minutes. A hot basket jumpstarts the crisping immediately.
- Step 2: Dry the wings thoroughly using paper towels. Press, don’t just dab. The surface should feel slightly tacky, not wet.
- Step 3: Add melted butter and toss until every wing is lightly coated. If it firms up a bit, that’s fine—it melts fast once cooking starts.
- Step 4: Season evenly with salt, garlic powder, onion powder, smoked paprika, and pepper. Use your hands and really rub it in so it clings to every edge.
Coat & Arrange
- Step 5: Add cornstarch and toss again until the wings have a light, dusty coating. You’re not looking for clumps—just a thin layer.
- Step 6: Arrange in a single layer with space between each piece. Don’t crowd the basket. If they touch too much, they steam instead of crisp.
Cook Until Golden
- Step 7: Air fry for 7 minutes at 400°F. You’ll start to see the edges turn golden and slightly blistered.
- Step 8: Flip and continue cooking for 5–7 minutes. The skin should look deep golden with crisp edges.
- Step 9: Check doneness with a thermometer. Aim for at least 165°F, but 180–185°F gives you more tender meat that pulls cleanly from the bone.
Finish & Serve
Let the wings rest for 1–2 minutes. Taste one, adjust with a pinch of salt if needed, or toss in sauce while still hot so it clings properly.

If you want to go beyond dry seasoning, tossing them in a sticky glaze like this sweet and savory honey garlic sauce gives you that glossy, restaurant-style finish.
Prefer something with a kick? A quick dip in a creamy heat like this spicy mayo sauce adds contrast without overpowering the crisp skin.
For extra crispness, you can return sauced wings to the air fryer for 1–2 minutes. This lightly caramelizes the sauce and helps it cling without soaking into the crust.
Air Fryer Tips for Perfect Wings Every Time
Small adjustments can take your wings from good to consistently great.
- Work in batches: Overcrowding is the fastest way to lose crispness. Cook in batches if needed and keep finished wings warm in a low oven.
- Shake or flip: Turning the wings halfway ensures even browning on all sides.
- Don’t skip preheating: Starting hot helps the skin tighten and crisp immediately.
- Use a rack if available: Elevating wings slightly can improve airflow in some air fryer models.
If your air fryer tends to run hot, reduce the temperature slightly and extend the cook time. This prevents the outside from over-browning before the inside becomes fully tender.
Lightly spraying the basket with oil before adding the wings can also help prevent sticking without affecting crispness. Avoid spraying the wings directly once coated, as too much oil can soften the crust.
Flavor Variations You Can Try
Once you have the base method down, it’s easy to switch things up without changing how you cook.
- Buffalo style: Toss in hot sauce and a little melted butter right after cooking.
- Lemon pepper: Add lemon zest and extra cracked pepper after frying for a bright finish.
- Garlic parmesan: Toss with grated parmesan, garlic powder, and a touch of butter.
- Sweet heat: Combine honey with chili flakes or hot sauce for a balanced glaze.
You can also try dry rub blends like Cajun seasoning, chipotle powder, or even a simple salt and vinegar finish using a light spritz after cooking.
How to Serve It
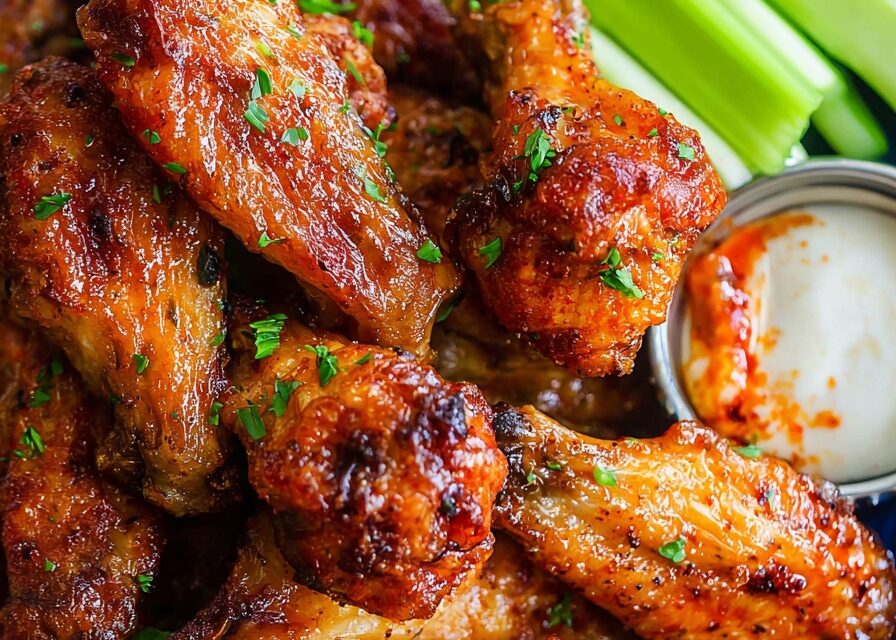
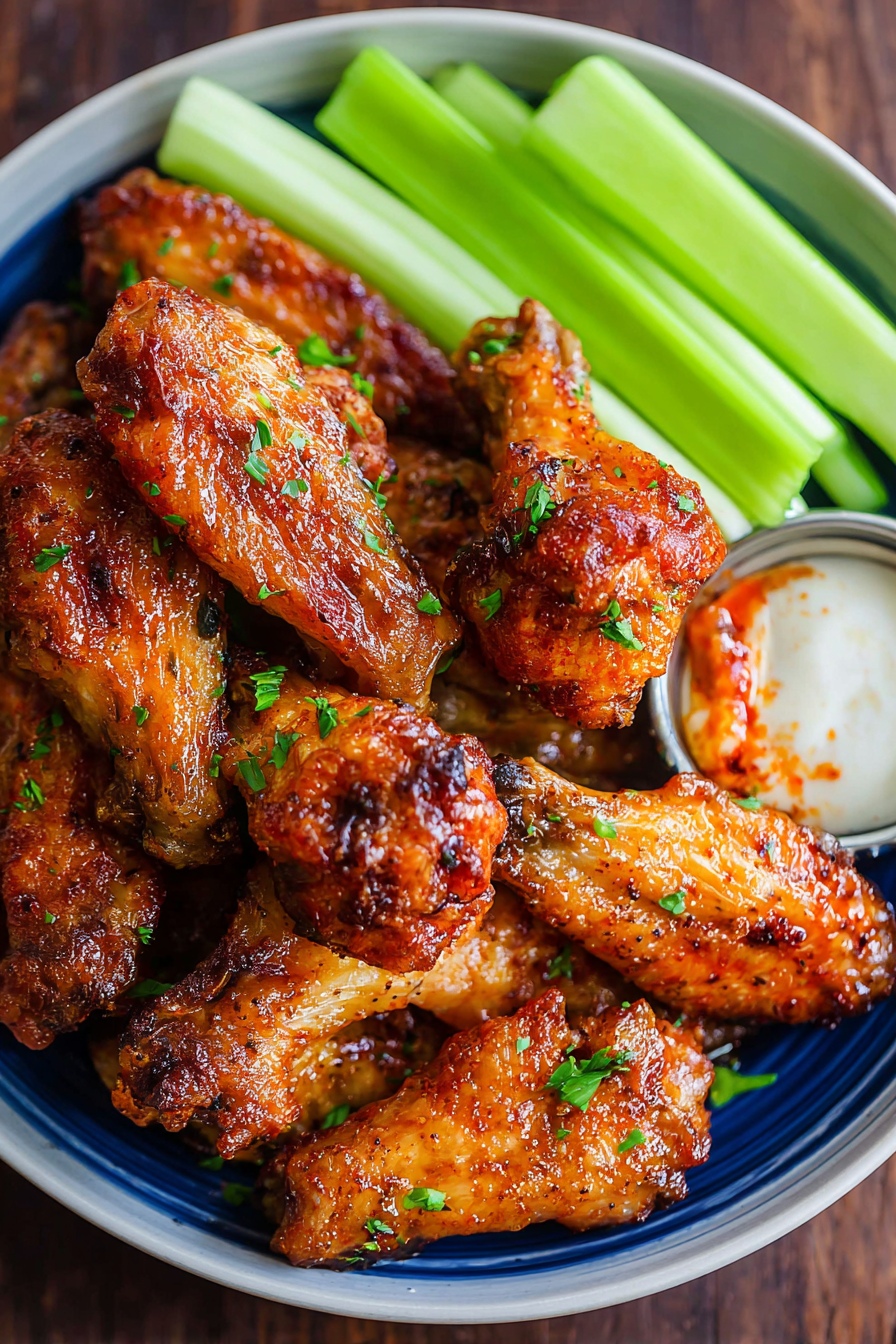
Serve these wings hot, straight from the air fryer. A simple plate with celery and carrot sticks balances the richness and gives a fresh crunch alongside that crispy exterior.
For a finishing touch, sprinkle a pinch of smoked paprika or chopped parsley right before serving. If you’re building a spread, add a bold option like a sticky BBQ wing variation alongside these for contrast.
They pair well with dips like ranch, blue cheese, or even a tangy yogurt-based sauce if you want something lighter. Serving multiple sauces on the side lets everyone customize without losing that crisp texture.
They’re at their best within the first 10 minutes—crispy, juicy, and hot. After sitting, the skin softens slightly but still holds good flavor.
Storage and Reheating
Store leftovers in an airtight container in the fridge for up to 4 days. Let them cool completely before sealing so they don’t trap steam.
Freeze for up to 2 months if needed. The texture softens a bit after thawing, but reheating helps bring some crispness back.
To reheat, air fry at 375°F for 4–6 minutes. This restores the outer crunch without drying out the inside. Avoid the microwave—it makes the skin rubbery.
If you plan to sauce them, store wings and sauce separately so the coating stays crisp.
For best results when reheating from frozen, thaw overnight in the fridge first, then air fry. This prevents uneven heating and helps maintain better texture.
Troubleshooting Common Issues
If something feels off, it’s usually an easy fix.
- Wings are pale: Increase cook time slightly or make sure your air fryer was fully preheated.
- Skin isn’t crisp: Double-check that the wings were fully dried and not overcrowded.
- Too greasy: You may have added too much butter. Stick to a light coating.
- Uneven cooking: Flip more carefully and ensure consistent wing size.
If your seasoning isn’t sticking well, it usually means the wings were too wet or the butter wasn’t evenly distributed. Toss thoroughly and press seasoning into the surface for better coverage.
FAQ
Can I make Air Fryer Chicken Wings from frozen?
Yes, but expect a longer cook time. Start at 400°F for 10 minutes, then drain any liquid before continuing. Drying them mid-cook helps improve texture and allows the skin to crisp instead of steaming.
Why are my wings not getting crispy?
Most often, they weren’t dried well enough or the basket was overcrowded. Moisture prevents browning, and tight spacing blocks airflow. Cook in batches if needed and make sure each wing has room for hot air to circulate.
Is cornstarch better than baking powder?
Cornstarch gives a lighter, cleaner crisp without altering flavor. Baking powder works too, but it can leave a slightly metallic taste if overused. For this method, cornstarch keeps the texture thin and crisp without heaviness.
What internal temperature is best for wings?
While 165°F is safe, wings taste better closer to 180–185°F. At that range, the connective tissue breaks down, making the meat more tender and easier to pull from the bone without drying out.
Related Recipes
- 30 Minute Chicken Parmesan Pasta Recipe
- 7 Year Perfected Grilled Shrimp Tacos With Pineapple Salsa
- 30 Minute Fresh Corn Tomato Salsa Recipe
- Quick Pickled Red Onions With Citrus Twist
Air Fryer Chicken Breast Recipe
- Prep Time: 10
- Cook Time: 30
- Total Time: 40
- Yield: 4 servings 1x
- Category: Appetizer
- Method: Air Frying
- Cuisine: American
Description
These air fryer chicken wings turn out crispy on the outside and juicy on the inside with minimal effort and no deep frying. A simple coating of butter, spices, and cornstarch creates a golden, flavorful crust every time. This reliable method delivers evenly cooked wings with great texture in under 30 minutes. Serve them with your favorite sides or pair with dishes like 30 Minute Chicken Parmesan Pasta Recipe for a complete meal.
Ingredients
- 2 lbs chicken wings (thawed, patted very dry for crispiness)
- 2 tbsp salted butter (melted, slightly cooled)
- 1 tsp kosher salt (or sea salt, fine grain)
- 1 tsp garlic powder (fresh, not clumpy)
- 1 tsp onion powder (for balanced flavor)
- 1 tsp smoked paprika (adds color and smoky depth)
- 1/2 tsp black pepper (freshly ground)
- 2 tbsp cornstarch (for crisp coating)
Instructions
- Preheat: Preheat air fryer to 400°F for 5 minutes until hot and ready.
- Dry Wings: Pat chicken wings thoroughly with paper towels for 2–3 minutes until no visible moisture remains.
- Add Butter: Place wings in a bowl and pour melted butter over them; toss for 1 minute until evenly coated.
- Season: Sprinkle salt, garlic powder, onion powder, paprika, and pepper over wings; rub for 1–2 minutes until fully coated.
- Coat with Cornstarch: Add cornstarch and toss for 1–2 minutes until a thin, even layer forms with no dry spots.
- Arrange: Place wings in a single layer in the air fryer basket with space between each piece to allow airflow.
- First Cook: Air fry at 400°F for 7 minutes until the skin begins to tighten and turn lightly golden.
- Flip: Turn each wing using tongs; ensure even spacing again for consistent cooking.
- Second Cook: Continue cooking at 400°F for 5–7 minutes until wings are deep golden brown and crispy.
- Check Doneness: Ensure internal temperature reaches at least 165°F (ideally 180–185°F for tenderness) and juices run clear.
- Rest and Serve: Let wings rest for 2 minutes until slightly cooled and crisp, then serve immediately.
Notes
- Substitutions: Use olive oil instead of butter for a lighter option, though flavor will differ slightly.
- Make-ahead: Season and coat wings up to 12 hours in advance; store covered in the refrigerator.
- Storage: Store leftovers in an airtight container in the refrigerator for up to 4 days.
- Reheating: Reheat in air fryer at 375°F for 4–5 minutes until hot and crispy again.
- Serving ideas: Pair with celery sticks, carrot sticks, ranch or blue cheese dressing, or toss in buffalo or barbecue sauce.
Nutrition
- Array
Finally crispy without oil
I’ve tried so many air fryer wing recipes and always got soggy skin, but the emphasis on drying the wings first and using just a little fat really worked. Mine came out golden and crisp in about 18 minutes.
★★★★★