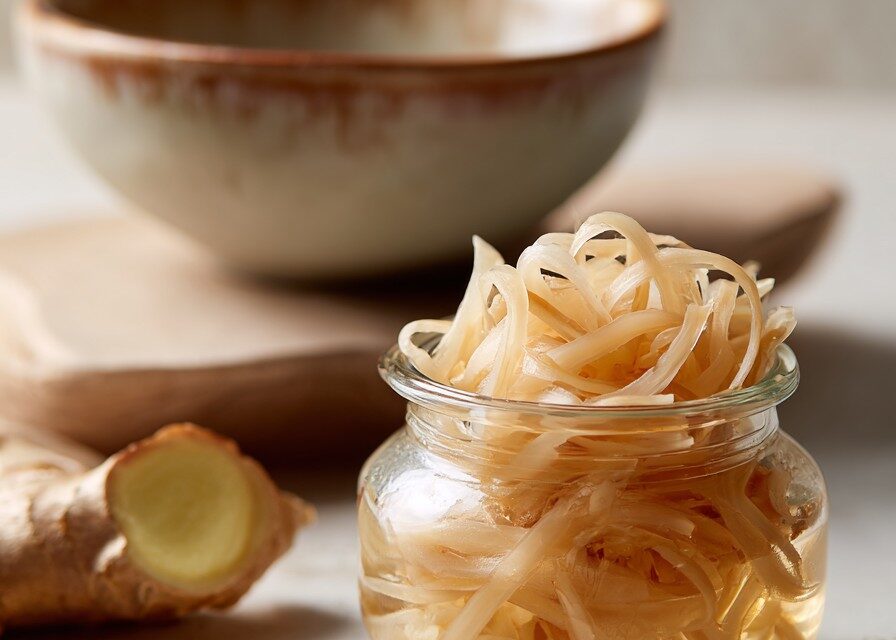
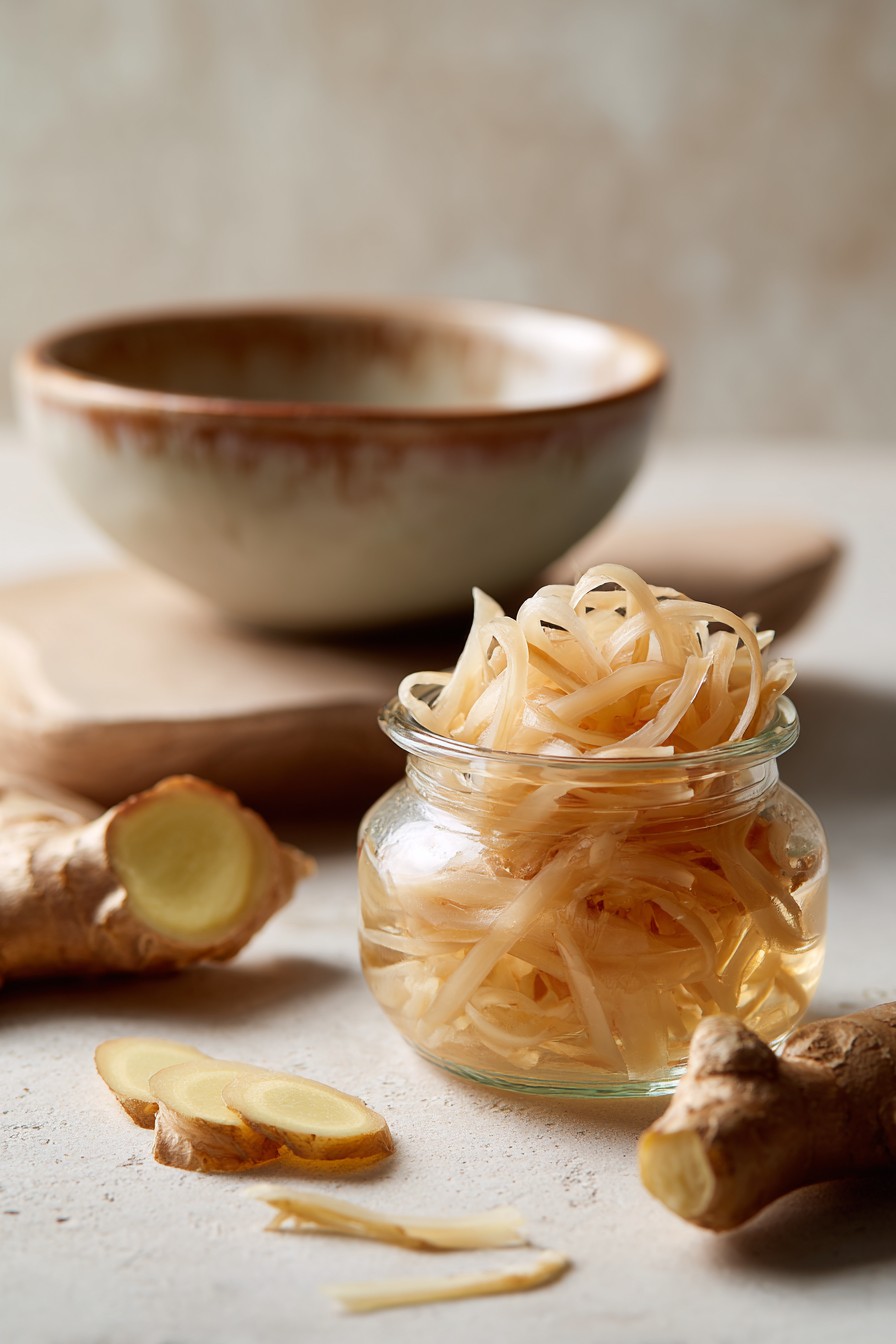
The Secret to Perfectly Pink and Crisp Pickled Ginger
Making gari that’s both beautifully pink and deliciously crisp comes down to a few key steps. First, opt for young ginger if you can find it. Young ginger has thinner skin, a milder flavor, and a natural pink hue that intensifies during pickling. Even beyond the flavor, don’t underestimate the quality of the ginger itself!
The blanching process is also essential. Briefly boiling the ginger before pickling mellows its sharpness, creates a more tender texture, and brightens that desirable pink color. Finally, the balance of sweet and tangy in the brine is crucial, and really can make or break a good gari. So let’s get pickling!
Why You’ll Love This Homemade Pickled Ginger Recipe
- Homemade gari is so much fresher and more flavorful than the store-bought stuff – the difference is amazing!
- It adds a wonderful tangy-sweet-spicy crunch to sushi, rice bowls, salads, and even sandwiches.
- This recipe is incredibly versatile; you can easily adjust the sugar to find your perfect level of sweetness.
- It keeps well in the fridge for weeks, so you can always have a jar on hand to brighten up your meals.
- It’s easier to make than you think and uses simple ingredients you can find at any grocery store.
What You’ll Need
Here’s what you’ll need to make this flavorful condiment.
Fresh Ginger Root
Fresh ginger is the star of the show. If possible, look for young ginger, which has thinner skin and a more delicate flavor. Avoid ginger that looks shriveled or has soft spots. The best young ginger will be firm, plump, and relatively smooth, without too many knobs or blemishes. When you scratch the surface of young ginger, you should be able to detect a pungent, aromatic scent. Older ginger, while still usable, will have a tougher skin and a more fibrous texture. If you’re using older ginger, you might want to peel it more thoroughly to remove as much of the tough outer layer as possible.
Rice Vinegar
Rice vinegar provides the signature tangy flavor that’s essential for pickled ginger. Make sure you’re using rice vinegar, and not another type of vinegar like apple cider or white vinegar, as those will have a much stronger and less authentic taste. There are different types of rice vinegar available, including seasoned and unseasoned. For this recipe, unseasoned rice vinegar is preferred, as it gives you more control over the sweetness and saltiness of the brine. If you only have seasoned rice vinegar, you may need to reduce the amount of sugar and salt you add to the brine.
Granulated Sugar
Sugar balances the tartness of the vinegar and creates the perfect sweet-and-sour flavor. I like to use granulated sugar, but you can also experiment with other sweeteners like honey or maple syrup. Different sugars will affect the overall flavor slightly. For example, honey will impart a floral sweetness, while maple syrup will add a hint of caramel. If using liquid sweeteners, you may need to adjust the amount of liquid in the brine to maintain the right consistency.
Salt
Salt enhances the flavors and acts as a preservative. Kosher salt or sea salt works best. Avoid using iodized table salt, as it can impart a metallic taste to the pickled ginger. Kosher salt and sea salt have a cleaner, purer flavor that complements the other ingredients. The salt not only adds flavor but also helps to draw out moisture from the ginger, contributing to its crisp texture.
Mirin (Sweet Rice Wine)
Mirin is optional, but I highly recommend it! It adds a subtle sweetness and depth of flavor that takes the gari to the incredible. This is the one ingredient that is always in my gari! Mirin has a lower alcohol content than sake and is sweeter, making it ideal for adding a touch of sweetness and umami to the brine. If you can’t find mirin, you can substitute it with a mixture of sake and sugar, or even a small amount of dry sherry. However, mirin truly provides a unique flavor that is worth seeking out.
How to Make Homemade Pickled Ginger Recipe
The process is simpler than you might think — it’s just a bit of slicing, blanching, and pickling!
Phase 1: Preparing the Ginger
Getting the ginger ready is the most important step. Thin slices are key for that perfect texture.
- Step 1: Peel the Ginger:
Using a spoon, gently scrape off the skin of the ginger. A spoon is much easier and less wasteful. The skin of young ginger is very thin and delicate, so a spoon works perfectly to remove it without taking off too much of the ginger flesh. For older ginger with thicker skin, you might need to use a vegetable peeler, but be careful not to remove too much of the ginger. - Step 2: Slice the Ginger:
Thinly slice the ginger root using a mandoline or a sharp knife. Aim for paper-thin slices. Uneven slices won’t pickle at the same rate. A mandoline is the easiest way to achieve uniform, paper-thin slices, but a very sharp knife will also work. Be extremely careful when using a mandoline, and always use the handguard to protect your fingers. If you’re using a knife, take your time and focus on creating consistently thin slices. - Step 3: Blanch the Ginger:
Bring a pot of water to a boil. Add the sliced ginger and blanch for 1-2 minutes. This softens the ginger slightly and mellows its flavor. Blanching also helps to remove some of the ginger’s pungency, making it more palatable. The blanching process also contributes to the pink color development, especially if you’re using young ginger. Be careful not to over-blanch the ginger, as it can become too soft and lose its crispness. The timing may vary depending on the thickness of the slices, so keep a close eye on them. - Step 4: Drain and Cool:
Drain the ginger immediately and transfer it to an ice bath to stop the cooking process. This helps preserve its crispness. Don’t skip the ice bath, or the ginger will become mushy. The ice bath rapidly cools the ginger, preventing it from overcooking and ensuring that it retains its crunchy texture. The shock of the cold water also helps to set the color and prevent it from fading. Leave the ginger in the ice bath for a few minutes until it is completely cooled.

Phase 2: Pickling the Ginger
The pickling brine is what transforms the ginger into gari. Make sure the sugar and salt are fully dissolved.
- Step 5: Make the Pickling Brine:
In a saucepan, combine the rice vinegar, sugar, salt, and mirin (if using). Heat over medium heat, stirring until the sugar and salt are completely dissolved. Heating the brine helps the sugar and salt dissolve more easily and ensures that the flavors meld together. Avoid boiling the brine, as this can cause it to become too concentrated. Stir constantly to prevent the sugar from burning or sticking to the bottom of the pan. Once the sugar and salt are dissolved, remove the brine from the heat. - Step 6: Pack the Ginger:
Drain the cooled ginger and pat it dry with paper towels. Pack the ginger tightly into a clean glass jar or container. Drying the ginger before packing it helps to prevent the brine from becoming diluted and ensures that the ginger absorbs the flavors properly. Packing the ginger tightly into the jar helps to keep it submerged in the brine and prevents it from floating to the top. Use a clean glass jar or container to avoid any unwanted flavors or contaminants from affecting the pickled ginger. - Step 7: Pour the Brine:
Pour the warm pickling brine over the ginger, making sure to completely submerge it. If needed, add a small weight on top to keep the ginger submerged. Ensuring that the ginger is fully submerged in the brine is crucial for even pickling and to prevent spoilage. If the ginger is not fully submerged, it can become discolored or develop mold. A small weight, such as a clean glass pebble or a small ceramic plate, can be used to keep the ginger submerged. - Step 8: Refrigerate:
Let the pickled ginger cool to room temperature, then seal the jar and refrigerate for at least 24 hours before serving. It’s best when cold, and the flavor will continue to improve with time. It can take several days to fully pickle. Allowing the pickled ginger to cool to room temperature before refrigerating it prevents condensation from forming inside the jar, which can dilute the brine. The flavor of the pickled ginger will continue to develop and improve as it sits in the refrigerator. For the best flavor, allow it to pickle for at least a few days, or even a week or two.
Phase 3: Optional Sun-Drying
This extra step is especially useful if you prefer a milder, less pungent pickled ginger.
- Step 9: Optional Sun Drying:
After an initial 24-hour steep in the brine, remove the ginger slices. Spread them in a single layer on a baking sheet lined with paper towels, and dry in direct sunlight for 2–3 hours. This helps to mellow the ginger’s flavor and adds a slight chewiness. Be sure to check on them and bring them in if the weather changes. Sun-drying the ginger helps to remove some of the excess moisture and intensifies the flavors. The sunlight also helps to further develop the pink color. However, be careful not to over-dry the ginger, as it can become too tough. The drying time will depend on the intensity of the sunlight and the humidity.
Expert Tips for the Best Homemade Pickled Ginger
- The younger the ginger, the pinker the final result will be. Mature ginger can still be used, but it won’t have that characteristic pink hue.
- For a sharper, more intense ginger flavor, skip the blanching step.
- Don’t overcook the ginger during the blanching process; otherwise, it will become mushy. One to two minutes is all you need.
- Taste the brine before pouring it over the ginger and adjust the sugar or salt as needed to suit your taste. The perfect balance of sweet and tangy is key to a delicious pickled ginger.
- Use a non-reactive container, such as glass or ceramic, to store the pickled ginger. Avoid using metal containers, as they can react with the vinegar and affect the flavor.
- Experiment with different types of rice vinegar. Some rice vinegars are sweeter or more acidic than others, so try a few different brands to find one that you like.
- If you want a more complex flavor, add a few slices of lemon or lime to the brine. The citrus will add a bright, refreshing note to the pickled ginger.
- Consider adding a small piece of kombu (dried kelp) to the brine. Kombu adds umami and depth of flavor to the pickled ginger.
- For a smoother texture, you can peel the ginger more thoroughly to remove all of the fibrous outer layer.
- If you find that your pickled ginger is too sweet, you can add a splash of rice vinegar to balance the flavor. Conversely, if it’s too tart, add a little more sugar.
- Don’t discard the brine after you’ve eaten all of the ginger! You can use it to pickle other vegetables, such as cucumbers or radishes.

Variations and Substitutions
There are lots of ways to switch this up!
- Pickled Ginger Recipe Without Sugar: Substitute the granulated sugar with a sugar alternative, such as honey or maple syrup, or your favourite zero-calorie sweetener. Adjust the amount to your taste, keeping in mind that honey and maple syrup will add a distinct flavor. When using sugar alternatives, be mindful of the potential differences in sweetness and adjust the amount accordingly. Some sugar alternatives may also have a slightly different texture or aftertaste.
- Spicy Pickled Ginger: For a kick, add a few slices of fresh red chili pepper (like serrano or jalapeño) to the brine. The chili peppers will infuse the pickled ginger with a spicy heat that complements the sweet and tangy flavors. You can also add a pinch of red pepper flakes for a more subtle heat. Adjust the amount of chili pepper to your preference.
- Pink Pickled Ginger: Use young ginger, and don’t skip the blanching step, which helps enhance its natural pink color. If you’re using mature ginger, you can add a small piece of red beet to the brine to naturally dye the ginger. Beets contain natural pigments that will impart a beautiful pink hue to the pickled ginger. Use a small piece of beet, as too much can make the ginger taste earthy. You can also add a few drops of red food coloring, but this is not recommended, as it can alter the flavor and texture.
- Vinegar Variation: While rice vinegar is essential for the best flavor in this pickled ginger recipe, you could experiment with seasoned rice vinegar. Be aware that seasoned rice vinegars already contain sugar and salt. So you might want to adjust the recipe overall. Seasoned rice vinegar can be a convenient option, but it’s important to check the ingredient list and adjust the recipe accordingly to avoid making the pickled ginger too sweet or salty. You can also use a combination of rice vinegar and other types of vinegar, such as apple cider vinegar or white wine vinegar, for a more complex flavor.
- Ginger Preparation: Consider experimenting with different cuts of the fresh ginger. Instead of only slicing, try thin matchsticks, or even grating some of the ginger before pickling to add a different dimension of ginger flavor and texture.
- Herb Infusion: Add sprigs of fresh herbs such as thyme or rosemary to the brine during the pickling process. This will create a savory pickled ginger that offers an alternative flavor to the common sweet version.
- Fruity Notes: Add a few slices of fresh fruit, such as thinly sliced pear or apple, to the jar during pickling. This will add sweetness, and the ginger will subtly infuse the pear or apple with its pungent flavor.
Storage and Reheating
- Fridge: Store the pickled ginger in an airtight container in the refrigerator for up to 2-3 months. The flavor will continue to develop over time. In fact, after your first batch, you might want to label it with a date! Storing the pickled ginger in an airtight container helps to prevent it from drying out and absorbing unwanted flavors from the refrigerator. The flavor will continue to mellow and improve as it sits in the refrigerator.
- Freezer: Freezing is not recommended, as it can alter the texture of the ginger, making it mushy and less appealing. Freezing can cause the water in the ginger cells to expand and rupture, resulting in a soft and mushy texture when thawed.
- Reheating: Pickled ginger is served cold, so no reheating is necessary. It’s best served directly from the refrigerator. Reheating pickled ginger can cause it to lose its crispness and flavor. It is best enjoyed chilled, as part of a sushi platter or garnish for a main course.
- Serving Suggestions: Consider the many creative ways you can use pickled ginger. Beyond serving with sushi, it can be chopped finely and added to salad dressings, used as a topping for grilled fish or chicken, mixed into stir-fries, or added to a cheese board as an unexpected element.
- Jar Sterilization: Don’t forget to sterilize your jars before pickling. This will prevent contamination and extend the shelf life of your pickled ginger. You can sterilize jars by boiling them in water for 10 minutes, or heating them in the oven at 250°F (120°C) for 20 minutes.
FAQ
Why is my Homemade pickled ginger not turning pink?
The pink color is from the natural reaction between the ginger’s enzymes and the vinegar, which is amplified by blanching. The pink is more prevalent in young ginger. If you’re using mature ginger, it may not turn as pink, or you may need to add a natural coloring agent like beet juice.
How long does Homemade pickled ginger last?
Pickled ginger will last in the refrigerator for 2–3 months, and I find it gets better as time goes on! The acidity of the brine acts as a preservative and helps to prevent spoilage.
When can I use it?
It tastes best when the flavor has infused properly, so after a week. Allowing the pickled ginger to sit for at least a week allows the flavors to fully meld together and the ginger to absorb the brine.
Can I use regular vinegar instead of rice vinegar?
No. Rice vinegar is critical for the authentic flavor of pickled ginger. Other vinegars have a much stronger and different taste that won’t be the same. Rice vinegar has a milder and sweeter flavor than other types of vinegar, which is essential for the characteristic taste of pickled ginger.
Can I reuse the pickling brine?
While you can reuse the brine, its flavor will be weaker with each use. It’s best used for quick pickles, not for long-term storage.
Is it safe to can pickled ginger for longer storage?
While possible, canning pickled ginger is not generally recommended due to potential changes in texture and flavor. Freezing is also not recommended. It is best stored for shorter periods in the refrigerator.
The ginger is too spicy! How can I mellow the flavor?
Blanching the ginger for a longer period can mellow out the spiciness. Soaking the sliced ginger in cold water before blanching can also help.
Related Recipes
30 Minute Chicken Parmesan Pasta Recipe
Hawaiian Bbq Pulled Pork Sliders
Watermelon Feta Bites With Mint Lime Drizzle
Homemade Pickled Ginger Recipe
- Prep Time: 10
- Cook Time: 30
- Total Time: 40
- Yield: 4 servings 1x
- Category: Side Dish
- Method: Boiling, Mixing
- Cuisine: Japanese
- Diet: Gluten Free, Vegan, Vegetarian
Description
This homemade pickled ginger recipe, also known as gari, brings a bright and clean flavor and satisfying crispness to your meals. It’s surprisingly easy to make at home and tastes far better than anything store-bought. You can even customize the sweetness to your liking. The blanching process is also essential to mellow its sharpness.
Ingredients
- 8 ounces fresh ginger (young ginger preferred)
- 1 cup rice vinegar (unseasoned)
- 1/2 cup water
- 1/4 cup sugar (adjust to taste)
- 1 teaspoon salt
Instructions
- Prepare Ginger: Peel the ginger and slice it very thinly using a mandoline or sharp knife.
- Blanch Ginger: Bring a pot of water to a boil. Add the sliced ginger and blanch for 1 minute.
- Drain Immediately: Drain the ginger and transfer it to a bowl of ice water. Let it sit for 10 minutes to stop the cooking process.
- Make Brine: In a saucepan, combine rice vinegar, water, sugar, and salt. Heat over medium heat, stirring until the sugar and salt are dissolved. Do not boil.
- Cool Brine: Remove the brine from the heat and let it cool slightly.
- Drain Ginger Again: Drain the ginger from the ice water and pat it dry with paper towels.
- Pack Ginger: Pack the ginger slices tightly into a clean glass jar.
- Pour Brine: Pour the cooled brine over the ginger, making sure all the slices are submerged.
- Seal and Refrigerate: Seal the jar and refrigerate for at least 24 hours before serving. The flavor will continue to develop over time.
- Shake Gently: After the first 24 hours, shake the jar gently to distribute the brine evenly.
- Taste and Adjust: After 2 days, taste the ginger and add more sugar or salt to the brine, if needed and let sit for another 24 hours before serving.
Notes
- Ginger Type: Young ginger has thinner skin and a milder flavor. If using older ginger, peel it more thoroughly.
- Sugar Substitute: You can use honey or maple syrup instead of sugar for a different flavor profile.
- Make Ahead: This pickled ginger can be made up to 2 weeks in advance.
- Storage: Store in the refrigerator in an airtight container for up to 1 month.
- Reheating: Not applicable; serve cold.
- Serving Suggestions: Serve with sushi, sashimi, add to rice bowls, salads, or as a condiment for grilled meats. For a delicious complement, try these Hawaiian Bbq Pulled Pork.
Nutrition
- Array